October 31, 2010
Auto Scan Tool, Auto Specialty Tools, Check Engine Light, Chevrolet, DIY, How To Auto Repair
No Comments
© DenLorsTools.com Summary: Applies to 2002 to 2009 second generation Trailblazers and Envoys with 4.2 Liter in-line 6 cylinders. This auto repair article is for GMC Envoys or Chevrolet Trailblazers when a P1281 fault code is scanned using a code reader or scan tool. The P1281 fault code is related to the engine not reaching operating temperature within the set parameter. More explanation of what the code means and suggestions on how to complete the repair much easier. Using any code reader or scan tool with OBD II capability is all that is needed to read and erase the fault code.
The thermostat is NOT just to keep the engine cool, it also helps the engine heat up quickly to normal operating temperature within a certain time-frame. For the catalytic converter to operate at it’s highest efficiency the computer needs to be in closed loop. Closed loop means that the computer is in more control of fuel mixtures based on inputs from several sensors. Until the engine is running at the normal operating temperature, the computer usually controls the fuel mix less efficiently. That’s why it’s important for the thermostat to stay closed until the engine warms up quickly. If it stays open or opens up too quickly the motor will not reach the desired temp as quickly as it should. Most of the time when this code is retrieved, the t-stat is not working properly.
1/4″ swivel socket and extension pictured above used to start the bolts.
The thermostat is located on the left side of the engine. After removing the driver’s front wheel the t-stat housing can be seen over the frame. A long 1/4″ extension and 10mm swivel socket makes accessing the bolts holding the housing much easier. Usually this thermostat comes with a new housing as well. The tricky part is starting the bolts back in when installing the new t-stat. It’s easy to drop the bolts before actually getting them started. An old trick for holding bolts in place in hard to get to areas is to use small orings to act as a retainer. The o-rings are perfect for preventing the bolts from falling and are small enough to be collapsed when the bolts are tightened as to not cause any problems with the housing seating properly.
To help hold the bolts in place small o-rings are used to prevent them from falling.
Once the thermostat is replaced and the coolant is refilled, the fault code can be cleared. Usually it’s best to run the heater when topping off the coolant to help remove any air pockets that may be in the cooling system. When the heat is blowing hot and the temperature is in the normal range the coolant level will be full. Hopefully this repair article has helped explain and answer questions about the P1281 fault code scanned with a code reader or scan tool. Be sure to check out the links below for even more information and specialty tools.
Related Car Repair Blogs and Auto Tools
Jeep Grand Cherokee Scanned P1281 Fault Code / DenLors Auto Blog
OBD II Scan Tools and Code Readers – DenLors Tools
Lisle Coolant Funnel to Remove Trapped Air in Cooling System
P0017 Chevy Trailblazer, Envoy, GMC Canyon, Colorado – Fault Codes
Chevy Auto Repair Articles – Automotive Repair Blogs for Chevrolet
Car Mechanics Specialty Tools – Automotive Tools and Shop Supplies
October 2, 2010
Auto Specialty Tools, DIY, Honda, How To Auto Repair, Timing Belt
No Comments
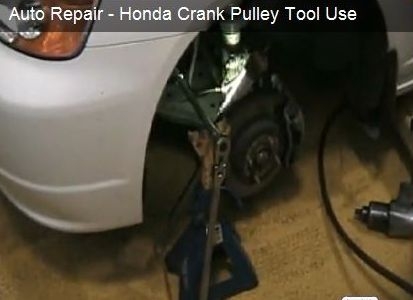
Still image above – see bottom of the article for our DIY video.
© DenLorsTools.com Summary: Honda crank pulley tool info. Questions and answers in comment section. In 2005 the first car repair article written for DenLors Tools was on Honda and Acura crankshaft bolt removal. Before that, many years ago, in the early nineties prior to selling automotive tools for a living, I worked at a car repair shop as a tech in Lakeland Florida and had a timing belt job. To my surprise the Honda had a very tight crank bolt to loosen. In fact it was so difficult to loosen (without the correct tool) that I was unable to remove it to replace the timing belt. Hating to lose a gravy job and being on flat rate… I tried everything. The problem was that the whole engine turns when trying to loosen the bolt. Read the rest…
September 25, 2010
Dodge Caravan, Engine Replacement, How To Auto Repair, Mechanics Tools
8 Comments

2.4 Liter (EDZ I4) engine removal suggestions save time compared to book instructions.
© DenLorsTools.com Summary: Removal instructions in the repair manual says to remove engine and transmission along with cradle from the bottom of the van. This engine can be removed from the top leaving the cradle, transmission and CV 1/2 shafts in place saving many hours of labor time! Included is a “stop motion” video showing removal and replacement – a time lapse showing in a couple of minutes the job that took 6 hours (book time is 13.9 hours). Applicable vehicles; 2001, 2002, 2003, 2004, 2005 2006 & 2007 Dodge Caravan and Town & Country mini vans w/2.4 4cyl.
Read the rest…
September 11, 2010
DIY, How To Auto Repair, VW
3 Comments

The VW in the image above was getting a new waterpump and timing belt.
© DenLorsTools.com Summary: The telltale battery light staying on means an alternator/generator replacement is needed in most cases. 2000 to 2005 1.8 Liter 5V Turbo engines in VW Passats and Audi A4’s have alternators that look easy to change, however access to the bottom alternator bolt can prove to be very difficult. The book labor time lists 2.8 hours to change this alternator! The most time consuming part of the job has to do with the front bumper removal to get to the fan so the lower alternator bolt can then be removed. The lower alt. bolt interferes with the fan if it is left in place preventing bolt removal. This car repair article is on how to change the alternator easily. DIYers along with some auto technicians that haven’t figured out the short cut (revealed in this repair article) will now be able to reduce the actual labor time by a couple of hours.
Read the rest…
September 4, 2010
Chry. 4.7 Problems, How To Auto Repair, TIME-SERT Kits
4 Comments
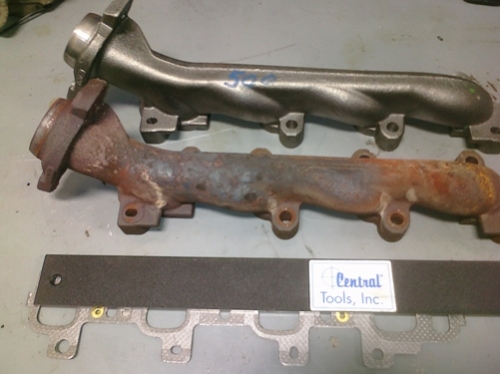
© DenLorsTools.com Summary: Dodge 4.7 engines ticking or tapping noise upon cold start-up is a very common problem. As the picture above indicates, exhaust manifolds and gaskets are usually the cause. Affected vehicles are Dodge Dakota pick up trucks, Dodge Durango SUVs and full size Dodge Rams equipped with 4.7 Liter engines. This auto repair article points out some of the things to look for when replacing the exhaust manifold gaskets on one of these trucks. Failure to inspect the exhaust manifold closely may lead to a repeat gasket failure. Suggestions on how to repair the problem right the first time – and the #1 cause of repeated failure is pointed out. It’s obvious once you know what to look for.
Read the rest…
August 11, 2010
Check Engine Light, Honda, How To Auto Repair
12 Comments
2006 Honda Accord Check Eng P0141 Heater circuit fault B1 S2
© DenLorsTools.com Summary: Auto repair article with information on the Honda Accord check engine light with a fault code of Po441 or P0135. Code definition and location of sensor when this code is stored in the vehicles computer. Car repair tips including how to access electrical plug for oxygen sensor past catalytic converter and which type of specialty is used for the sensor.
August 7, 2010
fuel pump, How To Auto Repair, Nissan
1 Comment
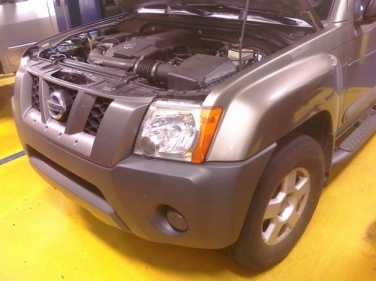
Summary: Automotive repair article covering a common problem related to Nissan Pathfinders and Xterras fuel gauge reading erratically. A check engine light may also be scanned with an OBD II code reader or scan tool related to a fault detected in the fuel gauge circuit (P0643 po463). Suggestions on how to diagnose, troubleshoot and save money on the repair. Repair article mentions tools used and has images.
July 31, 2010
Drivetrain and Noises, Honda, How To Auto Repair
45 Comments
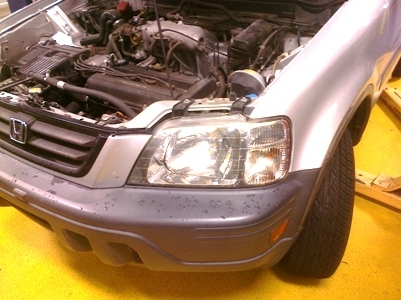
© DenLorsTools.com Summary: This auto repair blog covers 1996-2001 first generation Honda CR V’s which are making unwanted noises. Suggestions on what to look for when experiencing noises like thumping, grinding, rattling, clanking etc. Diagnosing the source of unusual noises coming from any vehicle can be very frustrating – knowing some of the common issues can help to make short work of troubleshooting the problem.
Read the rest…
July 24, 2010
Auto Specialty Tools, GM Intake, Head Gasket Repl., How To Auto Repair
5 Comments

© DenLorsTools.com Some head gasket sets come with replacement headbolts included automatically.
Summary: This automotive tech article is on TTY (Torque to Yield) head bolts. Headbolts that stretch require different tools, procedures and precautions compared to using conventional bolts. Improper procedures can result in bolt breakage and head gasket failure. Suggestions in this article help to insure the repair is done correctly the FIRST time.
Read the rest…