Window Motor and Regulator Installation Tips
July 9, 2012 8:47 am Dodge Dakota, How To Auto Repair, Power Windows
Fig. 1 After the door panel is removed the motor-regulator assembly comes out easily.
© DenLorsTools.com Summary: Tips on how to replace the window motor and regulator. On my 2007 Dodge Dakota the driver’s side window occasionally would not move (usually it would act up in the McDonald’s drive-thru). Other times it worked OK except for a little slower speed going up compared to the right front window.
The first thing to do is to determine if the motor is bad or not. See our article with tips on diagnosing power windows and regulators. Once it’s decided that the window motor or regulator is in need of replacement, here some other things to consider.
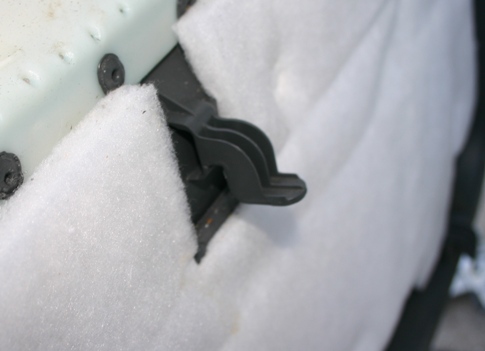
Fig 2
1. Remove the door panel carefully as to not break anything. Door panels all have screws. Some door panels have plastic retaining clips. Some door panels like on my 2007 Dodge Dakota have hooked attaching points (like above) that fit into the metal door frame. After the four screws are removed and one plastic retainer is popped loose by the mirror, the entire door panel can be lifted upwards to remove. Â After removing the door latch rod and unplugging the electrical switches the panel can be moved completely out of the way.
2. When removing the motor / regulator assembly like in fig. 1, be careful not to allow it to hit the inside of the door. The door skin is very thin on most cars today. Inadvertently, banging the regulator around inside the door can result in many outward dings on the door skin.
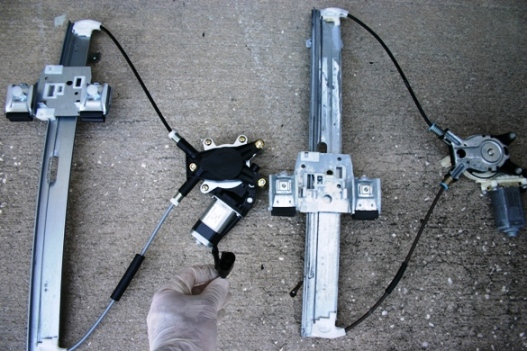
Fig. 3 It’s best to compare the old part with the new one before installation.
3. Double check the replacement parts. Sometimes parts are boxed wrong, sometimes part numbers are transposed etc. For these and many other reasons it’s always best to look the replacement part over for any potential differences. The plug on the aftermarket part had a 5″ long pigtail and the OE one was built directly into the motor.
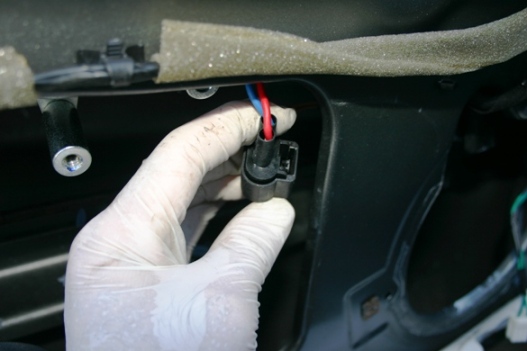
Fig 4 The electrical plug retainer on this aftermarket motor did not hold.
4. Make sure the wiring harness plug mates up as it should. If it has a pigtail like mentioned above make sure that it is not pinched and is routed out of the way of the window when it travels up and down. The electrical plug itself worked fine (Fig. 4) but the retainer was about an 1/8 of an inch from touching the mating portion on the truck’s plug. On aftermarket parts it’s common to find things don’t always fit as nicely as OE (original equipment). On this particular application the cost was much less than the OE part and the aftermarket part came with a lifetime warranty on the assembly. The warranty with the dealer part would be 12 months in comparison.
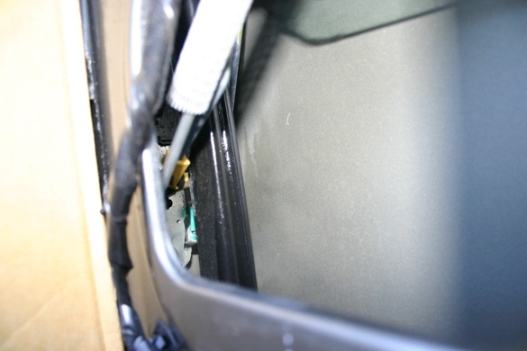
Fig 5 Window runs need lubrication to help the window slide freely.
Window runs can sometimes cause some binding. The window run is the rubber that is in the window  guide. It’s a good practice to apply some lubrication while the regulator is out. Use a silicone spray or paste. A dry lube like used on RV slide outs works great because it leaves no oily residue that can get on the window. Unlike silicone, the dry lube also doesn’t allow dirt to stick to the run. In rare cases, if the window runs can not be freed up by lubricating or have tears, they need to be replaced.
For more information on power window repair check out our other repair articles.