Jeep Differential Problems – Tools and Tricks
February 14, 2009 10:46 am Drivetrain and Noises, How To Auto Repair, Jeep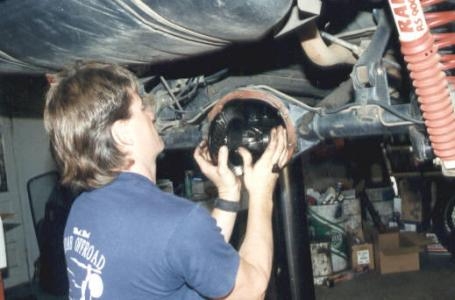
Image courtesy of Jeep-Offroad
Jeep Cherokee and Grand Cherokee differentials seem to have the highest failure rate compared to other makes and models. I’ve found this to be true in my years working as a master auto technician. Many technicians shy away from rebuilding rear ends even though they are quite accomplished otherwise. The actual R&R of the parts isn’t really that hard…it’s setting the rear end up so that there is no noises when your done.
Taking the Rear End Apart
Prior to removal of the bearing caps, be sure to mark them so you’ll know which side is left/right and top/bottom, but that’s the easy part. The harder problem is the actual set up. What I found is that in most cases, I would say 99% of the time it’s best to put the shims back exactly as they came out. Unless someone else has worked on the differential before; this is what I did with a very high success rate. The problem that I saw most guys having was being obsessed with trying to read the paint pattern on the gears. Some technicians will say if re-using the ring and pinion gears “Before removing the differential carrier from the housing, a pattern must be taken if the original gear set is to be used over again, to determine how the gear-set contact has been running.” Well I’ve never had much luck trying to read paint patterns. What I can do, is take a backlash reading with a dial indicator before disassembling. If working on the type of rear end that has threaded adjustments instead of shims on each side of the carrier bearings, this is a crucial step. The reason you would check the paint pattern of the gears or check the backlash before taking the carrier out, is the same. It’s to insure that when you put it back together the gears will be riding in the same place as before. The gears mesh and create a wear pattern, so if the gears are put back together differently the gears will be out of it’s normal wear zone and will make a whining noise. Even if the backlash is slightly more than what the specification calls for, I would put it back the same to have the best chance of no noise after bearing replacement.
Tools Needed for Rear End Rebuilding
-
Dial indicator for backlash measurement
-
Marking tool for bearing caps
-
Ft Pound torque wrench
-
Inch pound torque wrench
-
Impact gun
-
Large breaker bar
-
Bearing splitter
-
Bearing press
-
Cut-off tool
-
Air chisel
-
Pry-bar
 Pinion Shim and Crush Sleeve
I always used the same pinion shim and never used the same crush sleeve! Crushing the sleeve is very difficult. There have been many breaker bars broken trying to crush the sleeve. I resorted to using a huge 3/4″ drive bar after breaking my 1/2″ breaker bar and a borrowed one. Some technicians will use a 3/4″ or even 1″ impact gun to crush the sleeve, but I think this is a mistake. Once the sleeve is crushed it doesn’t take but a millimeter more to over-tighten the pinion nut. An over-torqued pinion nut will destroy a new pinion bearing. And once it’s tightened too much, it can’t be simply loosened back up. It has to be dis-assembled and a new crush sleeve installed and the whole process has to be started over again. Backing off an over-tightened pinion nut can lead to disaster. The pinion nut can loosen on it’s own causing the pinion to back into the ring gear and break it! So no matter how tempting it may be to re-use a crush sleeve or to back off an over-tightened pinion nut, it’s not worth the risk. Also as an extra precaution, I recommend using loctite on the pinion nut threads. Most pinion nuts are locking, but as extra insurance and piece of mind loctite is a small premium.
Other Sources of Information
I have another article that is geared (no pun intended) more towards the vehicle owner located at Ezinearticles. Also there’s a decent article at thedirtforum.com that I quoted in this blog that’s worth a look as well.
Linking: Please reference this article when quoting, linking to this page is welcomed and appreciated. If you are new to linking a page. 1. Left click the link; https://blog.denlorstools.com/2009/02/jeep-differential-problems-tools-and-tricks/ to highlight 2. Right click, select copy 3. Right click and paste to forum, blog web page etc. Thanks! Disclaimer: Repair tips are designed for informational purposes only, without warranty of any kind, in no event shall the author of this site be liable for any consequential, incidental or direct damages sustained in the course of using the information in this article.
dennisb - Auto Tool Sales :
Date: August 15, 2009 @ 10:49 am
Question from Jim through an email: I have a 1997 jeep GCL, rubber on metal grinding sound at 20 to 45mph, cannot hear sound after that as normal road noises more predominant at 45 plus mph, had problem for 60,000 km; car only has 123,000km, owned since new. Should I be concerned? What is likely cause? Thanks.
Answer: Jim, I can’t remember ever hearing rubber make a grinding sound, so nothing comes immediately to mind. Noises are hard to pinpoint sometimes and other times are they can be very obvious to a trained ear. I recommend asking someone at your local repair shop to go for a short drive. Most shops will agree to go for on a test drive for free. A technician that can hear the sound in person most likely give you a better idea of what the source of the noise could be.
Paul :
Date: August 28, 2016 @ 8:39 pm
Hi,
I happened to have stumbled on your site and read through some of the problem explanations. Good stuff here. My question on a 2006 Jeep Grand Cherokee Laredo 3.7L with the NAG1 transmission one of the pan bolts does not tighten and someone prior to me owning the vehicle may have stripped the threads. Anything special in re-tapping to a larger thread bolt and can you recommend size? Thank you. Paul
dennisb - Auto Tool Sales :
Date: August 29, 2016 @ 7:28 am
Paul, you’d want to restore the threads to accept the same size bolt with a Time Sert kit. First find out what size the metric bolt is and then find the right Time Sert kit that installs a steel bushing type insert that accepts the same size bolt. For instance, if you have a M6x1.0 the kit is is a 1610. I can help with the kit if we know what size the bolt is. FYI the bolt head size has nothing to do with the size of the actual bolt. Use a tap and dye set or a nuts and bolts section at the parts store to match up and determine the size of the bolt (like M6 or M8 etc.) and the thread pitch. Thread pitch is like 1.0, 1.25 or 1.5 etc. which signifies how coarse or fine the threads are. Also we’ll want to know the approximate depth of the hole to see if the inserts that come in the kit will work ok or if we need to look up a different length. Any questions let me know.